Turquoise polish - Splurge vs Save

Hello dear readers!


I hope you're having a great day!


I have set my eyes on Nicki Minaj's nail polish which is a collaboration with OPI. The colors in this collection are gorgeous but the one I really like is 'FLY'.


Feast your eyes on this gorgeous turquoise color!


We all know that OPI is a great brand with quality nail polishes, but if like me you always buy new nail polishes and you don't really re use them that much spending 10 euros for 1 single nail polish can seem to much.


If you like this color do not worry because I managed to find a cheap replacement which is just as good and just as bright!


The Rimmel 'Sky High' nail polish is the perfect dupe for OPI's 'FLY'. I love the applicator which is made for an easy application.


I bought this nail polish for less than 3 euros!! Isn't that a bargain?!!?


As you all know I always like to go the extra mile and experiment, so I put on some lovely pink hearts on my ring finger!


The above picture is with two coats of 'Sky High' and one coat of Rimmel's 'Ultra Shine Top Coat'


Hope you liked this post girls!


Don't forget to join us on Facebook...it's soooo easyyyyy! Just click HERE!


Apple Crumble

Hi Ladies !!

You have some friends coming over? or you've been invited over. Don't panic  just get these 5 ingredients, which most of you, i'm  sure you already have in your kitchen, and bake the apple crumble that tastes like heaven every time i bake it :)


For the crumble :

300 grams Plain Flour
175 grams Brown Sugar
200 grams unsalted butter (stork) room temp


For the Filling:

450grams Apples peeled, cored  and diced into small pieces
50grams brown sugar
1 tbsp plain flour
1 pinch of cinnamon


Preparation

Preheat the oven to 180 Degrees

Place the flour and sugar in a large bowl and mix well. Taking a few cubes of butter at a time rub into the flour mix. Keep rubbing until the mixture looks like breadcrumbs.


Peel and dice the apples.


Place the apples in a large bowl and sprinkle over the sugar, flour and cinnamon. Stir well being careful not to break up the apples.

Butter and oven proof dish. Spoon the mixture into the bottom , then sprinkle the crumble mixture on top .


Bake in the oven for 45-45 minutes until the crumble is browned and the apples a bubbling and soft.

Serve hot with ice cream or custard.

Don't forget to like us on Facebook ...it's easy! just click HERE!


What I'm loving!!

Hello Ladies!

It feels like it's been ages since I posted a fashion post and for this I apologize!

So I thought I'd do a post about what I'm liking at the moment. Most of these items I have similar bits in my wardrobe which I am currently wearing a lot.

So here it goes!

Chiffon shirts are the perfect Spring Summer tops! They are so chic and go well with denim as well as smart outfits! It can be dressed up or down. I love them all...colored, printed, plain!
Smart Cropped trousers are in at the moment...I was never quite sure whether I liked them or not, but I found a really cute one on Sale the other day and thought it was so cheap that I'd buy it and see if I'd learn to like it. Sure enough I am in love with it. The fit is so flattering and dressed with very high heels they're gorgeous!

Flowers and flower patterns have been with us for quite some time now and they look like they're here to stay. They are so girly and cute! If you do not like the full on flower pattern why not go for a simple necklace like the one in the picture?


Neon shoes! I have set my eyes on a pair of yellow pumps and can't wait to go buy them! Color is so in at the moment and I intend to make the most of it!

I am also loving jeweled collars on tops or shirts. I really like detail as it is what makes an outfit special. I find this to be so sophisticated and makes the look more interesting! Must admit...I'm a sucker for bling!

So girls....I'm curious...tell us what are your fashion obsessions at the moment? Let's share ideas...let us know in the comments section below!!

Don't forget to like us on Facebook ...it's easy! just click HERE!

xxx

Vongole , Mussels & King Prawns


Hi Ladies, it's been a while i know. But i was really busy and i was abroad too :).

This is one of my favorite meals.... MMMMMMMMMM smells like summer.

So for 2 persons you will need the following

250 Grams of Spaghetti

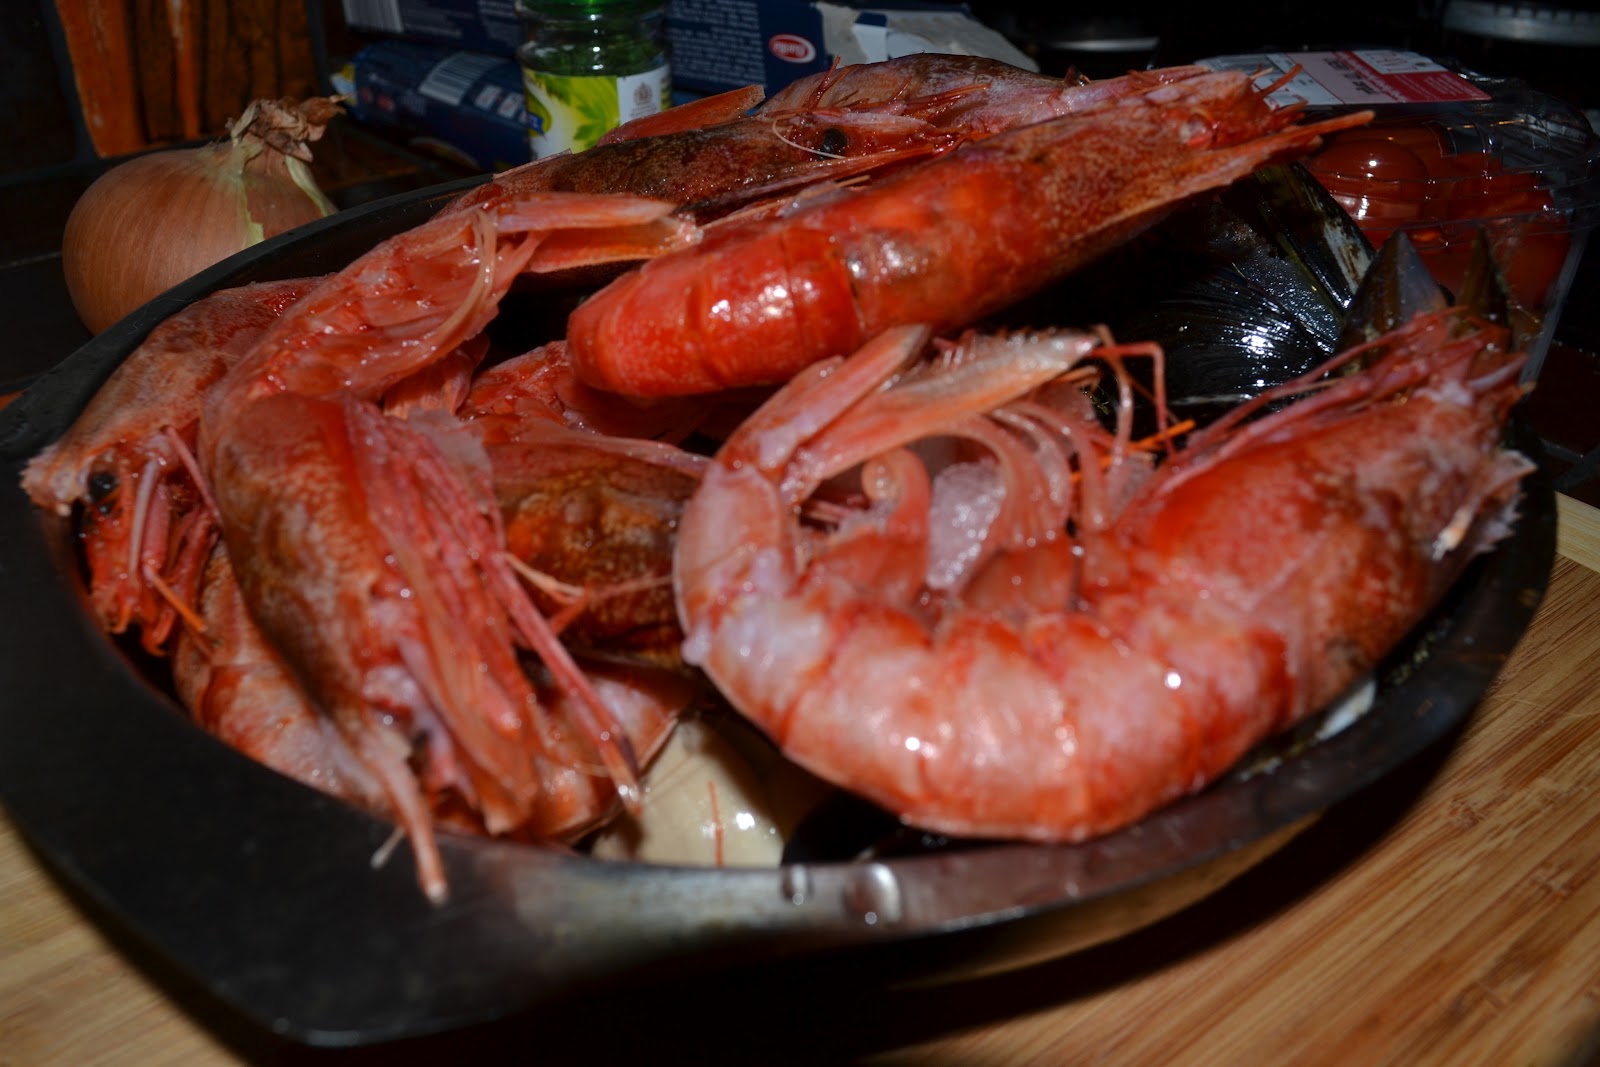
10 good sized King Prawns

10 Mussels

and 500 Grams of Vongole.

Some Cherry Tomatoes or normal tomatoes will do just fine

1 large Onion

4 Cloves of Garlic

1 Fish Cube

2 Glasses of white wine

Butter, parsley, & some olive oil  


PS: the mussels are the black ones the White ones are the vongole, You can even buy a jar of vongole without the Shells it's cheaper. 


King Prawns


Chop the tomatoes the onion and the garlic.

In a medium sized pan , melt some butter together with some olive oil. Put half the onion and half the cloves in with the butter . Let them cook for a little while. Don't let them turn black. It wont look nice in your plate later on :(.

MMMMMMMM it already smells great.

Boil some water for the pasta to use later.


Now add the vongole and the mussels in with the butter and onion.

Melt the cube in some boiling water pour half of it in this pan and keep the other half aside do the same with the glass of wine.

Add half your chopped tomatoes and some parsley on top of every thing and let it simmer for around 25/30 mins.. If the sauce reduces pour in some more wine. (But i should be fine)

 Its time to put the pasta in the boiling water.


The King prawns will only need like 8 mins to bee cooked, So once you put the pasta in the boiling water, in another pan melt the butter and put all the remaining ingredients in the pan. 
Butter, olive oil, onion, garlic, tomatoes, fish cube and wine.

Place the King Prawns one buy one not on on top of each other , so u will need a big pan for this.


When the pasta is ready just switch off the king prawns burner. 

Put you pasta in the colander so all the water will drain, Put it back in a pan and just add the sauce that is left in the pan of the vongole and mussels.

Once that is ready just place the spaghetti in your plate vongole & mussels on top and King Prawns on the side.

And simply Enjoy :)


Purple Reign eye makeup look!

Hello Ladies!

I hope you are all doing great!

Today I'm coming back to you with another eye make up look...which is very very easy.

This is the end result!


I decided to go with purple and pink because they are very popular colors when it comes to eye shadows and basically go with every eye color and complection.  I don't really believe that there are colors that don't flatter certain eye colors....blue doesn't necessarily have to be used by people who have blue eyes. The secret is to find the shade that goes well with your eye color and skin.

Anywaysss back to this easy easy eye look! :)

The first thing is to choose your favorite purple shadow and apply it on your eyelid. I chose a dark purple because I still wanted to have strong color even after blending it out.


The purple I used is from  the urban decay dangerous palette. You can obviously use any purple color you have in your makeup collection.


The next step was using a pink color to blend out the purple. So I grabbed a blending brush with a cute pink color and applied it on the upper part of the purple. This is very easy all you need to do is place the brush on the edge of the purple color and with a wind shield wiper motion (from side to side) you blend out the purple with the pink to avoid any harsh lines and create that nice color transition.

This is the pink color I used. This is from the BH cosmetics  tropical color palette. Again, this is just to give you an idea of the colors I used....you don't need to be using the same exact products!
This is the result after blending. As always I used a white or off white color on the brow bone and some of the purple we used in the beginning to line my under eye area.

Now for those of you who are not afraid of going the extra mile! I used some glitter and spread it on the eyelid and used fake lashes!

I used the purple glitter in this NYX palette. Loose glitter will also do the trick ;)


Ohhhh and I almost forgot to tell you! Never forget to put some shimmer on you tear duct as it will make a lot of difference! It will open up your eyes and make the whole look better!


These are the other brushes and products I used! An eyeliner and mascara and a blending brush and a flat brush!

So girls...I hope you enjoyed this look. If you would like to see a particular look let us know and we will do our best to re create this!

See you soon :)

Oh and don't forget to join us on facebook...it's easy just click HERE .And spread the word with your friends & share :)

xx


Chocolate Heaven

I'm sorry for those of you that are not eating sweets at this time of year. But for those who can

You will need


175grams margarine (room temp)
3 eggs (room temp)
175 grams caster sugar
175 grams self raising flour
50 grams Cocoa Powder
1 tablespoon Baking Powder
1/2 tablespoon Vanilla extract


1 Large jar of NUTELLA yammi yammi


Preheat oven 180 degrees


In a bowl mix the margarine and the caster sugar once the sugar is all blended in the margarine , add the eggs one at a time and continue beating by hand (if by mixer about 5 mins )


Sift the flour. Mix half the flour into the mixture. When it is well combined , fold the other half of the flour with the cocoa powder and baking powder and add to the mixture too. Stir in vanilla extract.


Butter the base of the baking tray and cut a piece of baking sheet for the base.


I use this baking tray


Put the mixture in the baking tray.


Bake the chocolate cake for about 30 to 40 mins or until a scewer inserted in the  middle cames out clean

When ready let it cool for an hour. Then slice it horizontally as a below pic.


In a saucepan heat some water and put the jar of Nutella in it. When it starts to melt just spread on the cake :). Don't cheat stop licking the spoon :). I added whipped cream on top of the nutella (but it's optional). If you decide to use it just follow the method on the packet.


If you are going to use the cream spread it now. And just put the other part on top of the one spread with nutella and cream(optional).

Last step grab what's let in the nutella jar and pour it on top of the cake and with the help of a scraper scrape the nutella all around the cake.

You will end up with this CAKE.


Put in fridge for about 30 to 45 mins and get it out 20 mins before serving to get room temperature.


Enjoy !!


Oh and don't forget to join us on facebook...it's easy just click HERE .And spread the word with your friends & share :)


Rainbow Cupcakes

Hi Ladies hope everything is well. I'm stuck at home because my husband had a puncture this morning and took my car :(. So i decided to have some fun in the kitchen :)

Here is the recipe of the Rainbow cupcakes you will make 6 cupcakes in all with the following ingredients. I use a Silicone mold and they are deep that's why just manage to bake only 6, but if you have a normal muffin tray, you might be able to bake even 10 or 12


125 grams Caster Sugar
125 grams unsalted butter ( stork)
2 eggs
125 grams Self raising Flour
1 Teaspoon Vanilla Essence
3 Tablespoons of whole milk
Food coloring Red,Blue,Green,Yellow


Start with preheating the oven at 220 Degrees .

If you have the muffin tray, It's better if you grease it. Mine is Silicone so i don't need to.

Mix the butter and the caster sugar together until the sugar is all gone, a fork will do the job. Beat the eggs in one at a time adding a little flour in each time until the ingredients are mixed. Add the vanilla essence and mix. Then  add the milk 1 tablespoon at a time mixing after each tablespoon.

You will get this.


Now divide the mixture into 6 bowls add coloring as below and mix so that the mixture in the bowls will become colorful.

In Bowl 1 - add half a cap of red coloring
In Bowl 2 - add half a cap of red and half a cap of yellow
In Bowl 3 - add half a cap of yellow
In Bowl 4 - add half a cap of green
In Bowl 5 - add half a cap of blue
In Bowl 5 - add half a cap of blue and half a cap of red


Divide the purple mixture in the tray and repeat with the other colors. Till you get something similar to this.


Bake for 10 to 15  mins and you should end up with something like this 


 The bottom part is not burned (like my husband thought) it's cause it's the Purple color.


Ladies hope you had fun as much as I
 did baking these Cupcakes :)


Oh and don't forget to join us on facebook...it's easy just click HERE .And spread the word with your friends & share :).